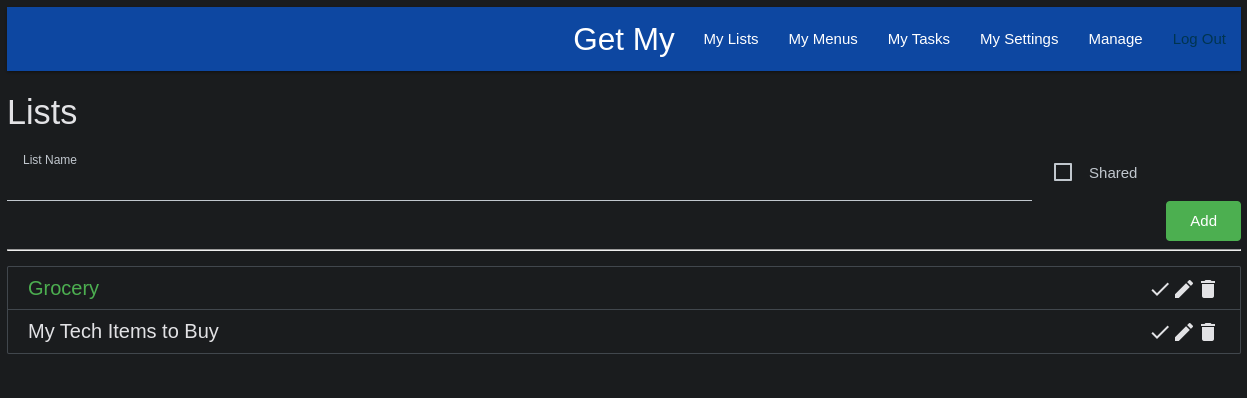
Creating Lists
Any user can create a new List in Get My. Lists were originally created to be used as a "Shopping LIst", but feel free to use them for anything you want. I've used them for Lists to help me go through all the things we needed to do before leaving on a trip, and so on.
When you go into "My Lists" on the top navigation, or the slide out panel on Mobile, you will see any Lists you've created and not marked as complete, then you'll see an option you can click / touch to create a new List.
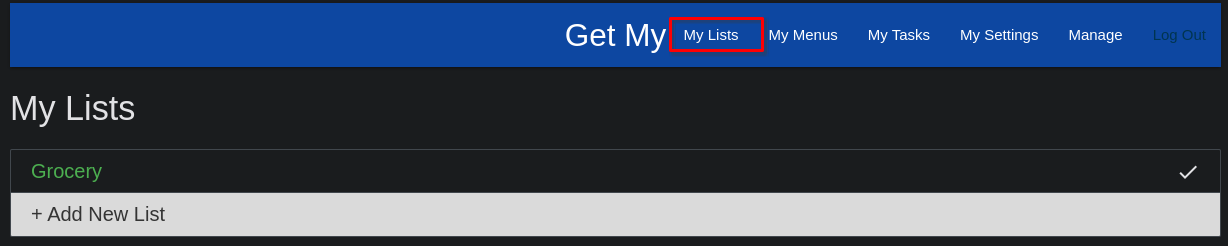
Give the List a name that means something to you / your users, and if you want this List to be shared with all of the other users on the Get My install, check there 'Shared' checkbox. Then click the 'Add' button. You can add as many lists as you need / want. When done adding lists, click / touch the 'Done' button to dismiss the pop-up for adding new lists.
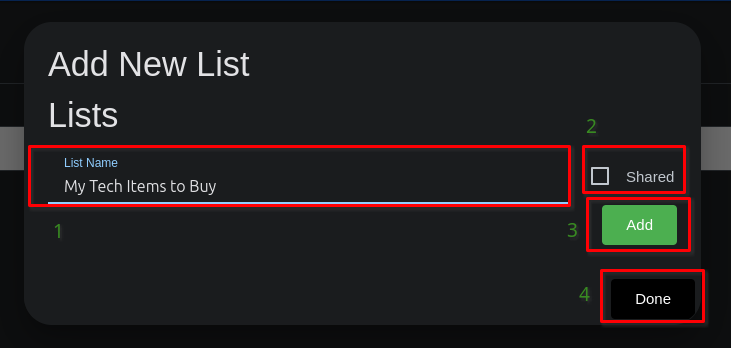
Any list you don't check the 'Shared' checkbox for, will be visible only to your user.
In the Lists listing grid, you can touch / click a row to go into that list. If the List is "complete" (no longer needed / valid) you can touch / click the check-mark icon for that list / row and the List will be removed from the listing grid.
Administration of Lists
System Administrators can manage Lists by navigating to 'Manage >> Lists' in the top bar or slide out menu.
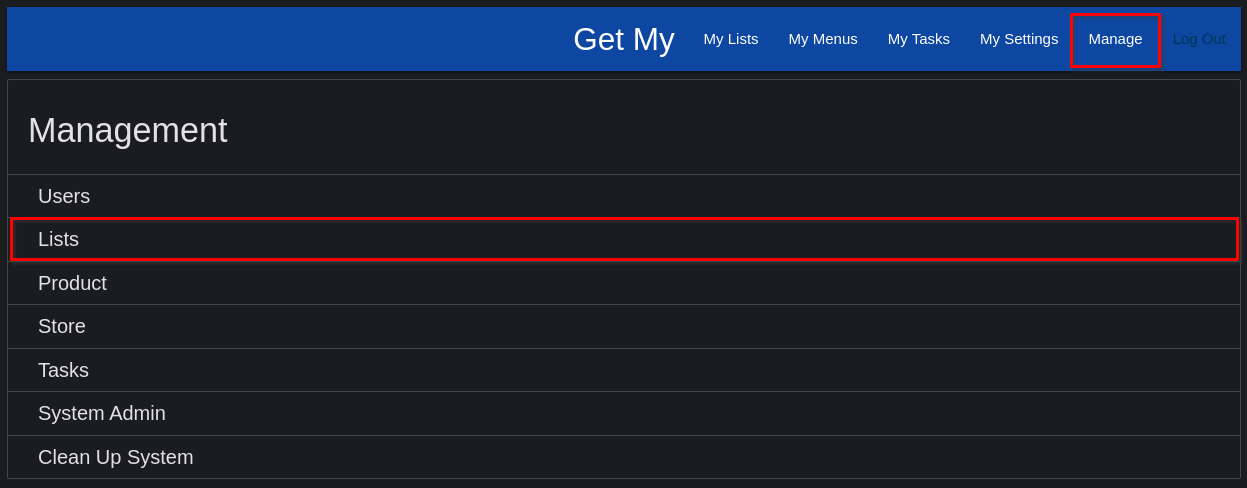
Once on the List Management page, administrators can add Lists much the same as you would from the My Lists page. Additionally, administrators can Edit, Delete, or mark Complete any Lists currently in the system and not marked complete already.