Get My User Documentation
How to use the Get My application.
- Installation of Get My
- Registration / Login
- Registering a New User
- Login as an Existing User
- Administrative - Disable Registration for your Site
- Products and Stores
- Lists
- Menus
- Tasks
Installation of Get My
How to setup and run Get My
Install with Docker and Docker Compose
First, you'll need docker / docker compose installed on your host system. Luckily, you can get docker installed on Windows, MacOS, and Linux.
I'm a Linux user, so that's what these directions will focus on, but if you are familiar with docker on Windows or Mac you should be able to adapt them fairly easily.
If you don't have docker and docker compose installed yet, good news is that on Linux it just takes one command:
curl -fsSL https://get.docker.com/ | shYou'll need curl installed in order to use the above command. I'll leave that up to you.
Once you've installed docker (it now comes with docker compose btw), you'll want to create a folder to keep your Get My docker compose and data folder in.
mkdir -p docker/get_my
Now move into that folder with
cd docker/get_my
Next, let's create our compose.yaml file, which is what docker compose uses to bring up our Get My application.
nano compose.yaml
In this new file, you'll want to copy the text block below, then make a few changes for your own needs:
NOTE: if you have a CPU without the AVX instruction set, you can change the line 'image: mongo' to be 'image: mongo:4.4'in the compose.yaml file below.
---
services:
  get_my:
    container_name: get_my
    image: bmcgonag/get_my:latest
    ports:
      - "80:3000"    # you can change the left side to a less common port number if needed
    healthcheck:
      test: curl --fail -s http://localhost:3000/ || exit 1
      interval: 30s
      timeout: 10s
      retries: 3
    links:
      - mongo
    depends_on:
      - mongo
    restart: unless-stopped
  mongo:
    container_name: get_my-mongo
    image: mongo
    volumes:
      - ./data:/data/db    # this will store the application data in the same directory where you have the docker-compose.yml file. the directory on your host will be called 'data'.
    restart: unless-stopped
If you already have the host port 80 in use on your host server, you can change 80 in the port mapping 80:3000 to be some other port number that is not in use. I suggest using a port above 8200 in order to not conflict with ports that the system may use by default.
Once you've made any needed changes, save the file with CTRL + O, then press Enter to confirm, and exit the nano text editor with CTRL + X.
We are ready to startup the application:
docker compose up -d && docker compose logs -f
The one-liner above, is really two commands concatenated with the &&. The first says to pull down the images, and start the needed containers with the settings we provided in the compose.yaml file. The second part says we want to watch the logs as things are starting up.
All we are really doing is checking to see if there are any errors in the log.
Assuming you've seen no errors, you can now browse to the IP address of your host machine, on the port you specified on the left side of the port mapping in the compose.yaml file.
If the page loads make sure to check out the Registering Users information in this documentation.
Registration / Login
Registering a New User
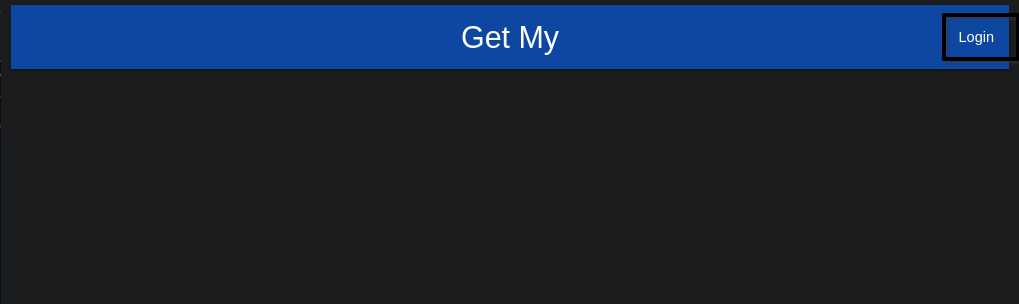
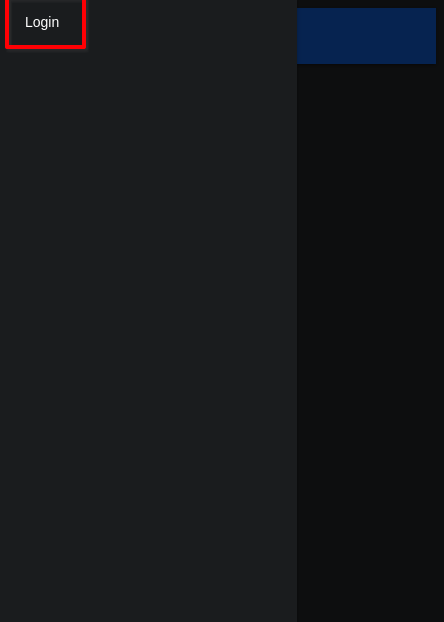
Registering as a new user in Get My isn't difficult. Once you have the application up and running, navigate to the application URL in your favorite browser. If you are on a laptop, desktop, or tablet, you'll likely see a 'Log In' option in the upper right corner.
If you are on mobile, you'll see a hamburger menu icon in the upper left corner.
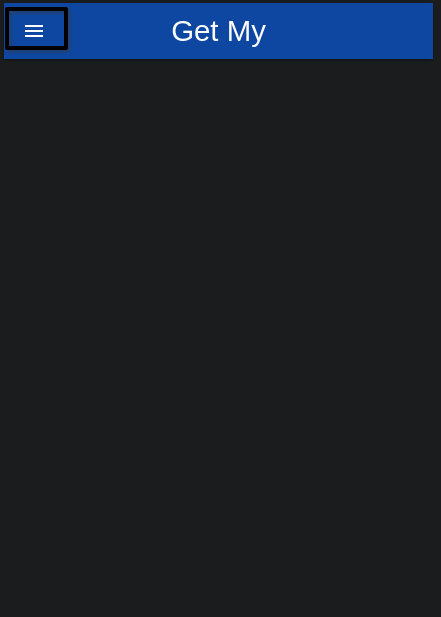
You can touch the hamburger menu to expand the left side panel on mobile. Here you'll find the 'Login' option. Touch that, and then you'll be presented with the login form. On desktop you can click the 'Login' option, and you'll be presented with the login form.
At the bottom left of the login form, you'll see a 'Register' option if the system administrator has left registration enabled.
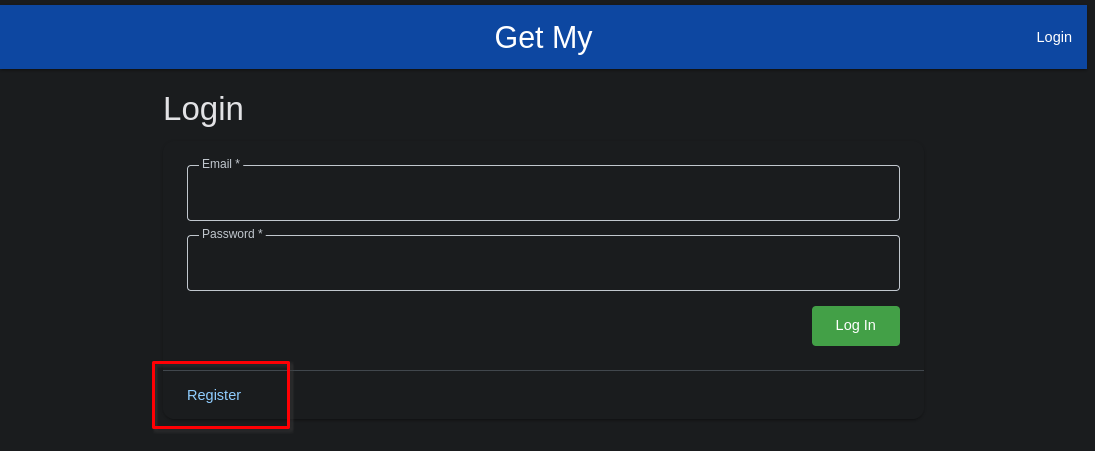
If there is no 'Register' option at the bottom left of the login screen, the system administrator has disabled registration through the application management tools. You'll have to speak to your system administrator about getting this enabled.
Assuming you have registration enabled, you can click / touch that option, and you'll be presented with the registration form.
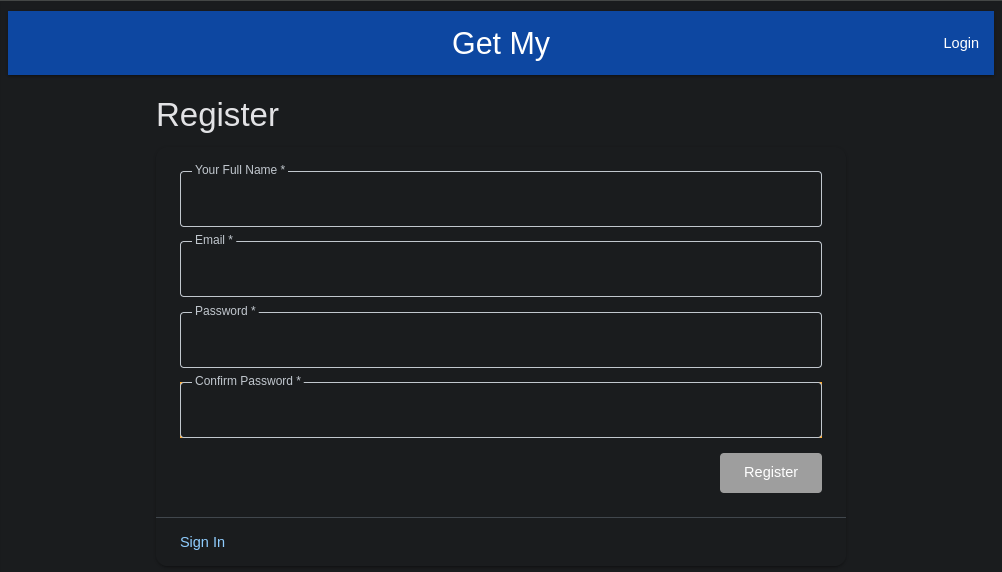
Fill out the form. The email does not have to be a valid email. There is no email validation or notification at this time. Click 'Register' when the form is complete.
You'll be logged in if all information is validated (passwords match, email is in an email format at least).
The first user to register in the Get My application is automatically given the role of 'System Administrator'. This person has full control over the system wide settings, as well as data entered by anyone in the system.
If you mistakenly go to the Registration page, you can return to the Login page by clicking the 'Sign In' link at the bottom left of the registration form.
Login as an Existing User
On smaller mobile devices (small tablets, smart phones, etc) you'll see the hamburger menu icon in the upper left of the screen. Touch / click it, and you'll see the login option appear in the left side bar as it expands.
In either case, click / touch the 'Login' option, and you'll be presented with the Login form. Enter you email and password, and click the 'Login' button to log into the Get My app.

Administrative - Disable Registration for your Site
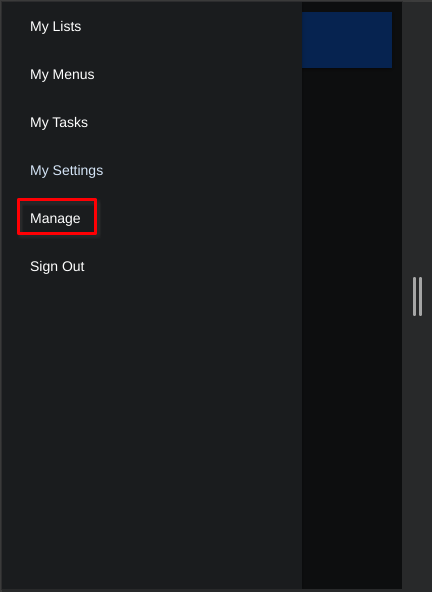
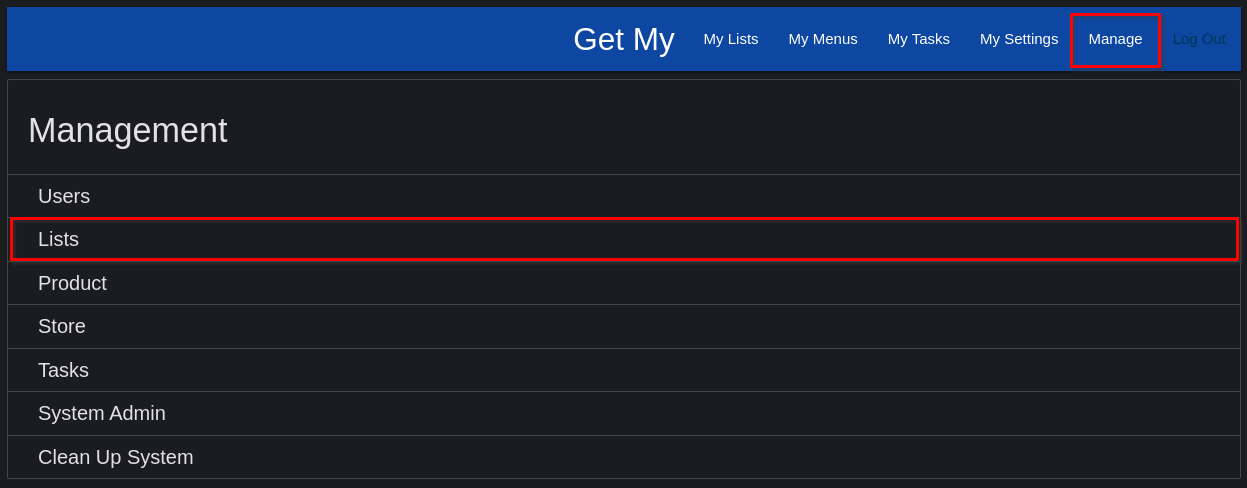
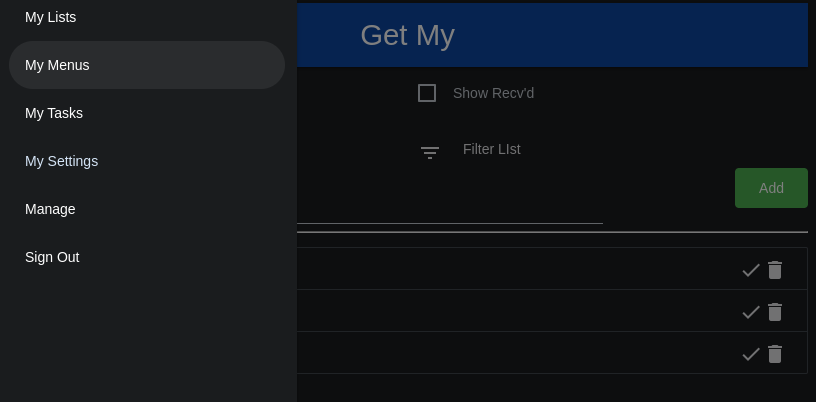
As an administrator of the Get My system, you will have the ability to manage whether registration remains enabled for your site. If you prefer not to have other persons registering for your site, or you have registered all of the users you expect to have using the site, you can disable registration by logging in as an administrative user, and clicking on the 'Manage' option in the upper right menu on desktop, laptop, or tablet; or by clicking / touching the hamburger menu icon on mobile, and selecting 'Manage' from the slide out side bar.

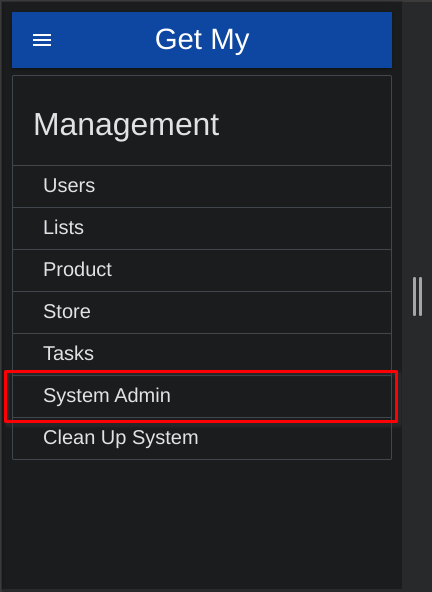
Once you are on the Management screen, you'll select the option for 'System Admin'.

Finally, in the System Admin view, you can disable registration by switching the toggle to the left.
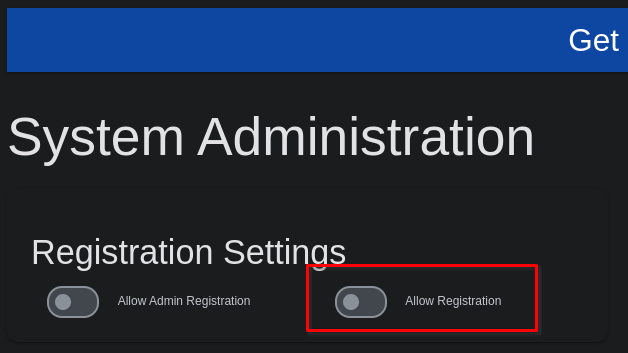
Users will no longer be able to reach the Registration page, and will be shown a friendly message telling them that Registration is disabled if they happen to reach it directly by the URL.
Products and Stores
Setting up products and stores in Get My to make your lists, menus, and shopping more efficient.
Add and Edit Stores
Stores are used as an organizational tool in Get My. You can assign stores to the Products you'll add to the system. Eventually, you'll be able to sort your shopping list by the stores products are available from so that you can get your shopping done more efficiently.
If a product is available at more than one store, it will show up in both stores' list section, but will be cleared when you clear it from either list section.
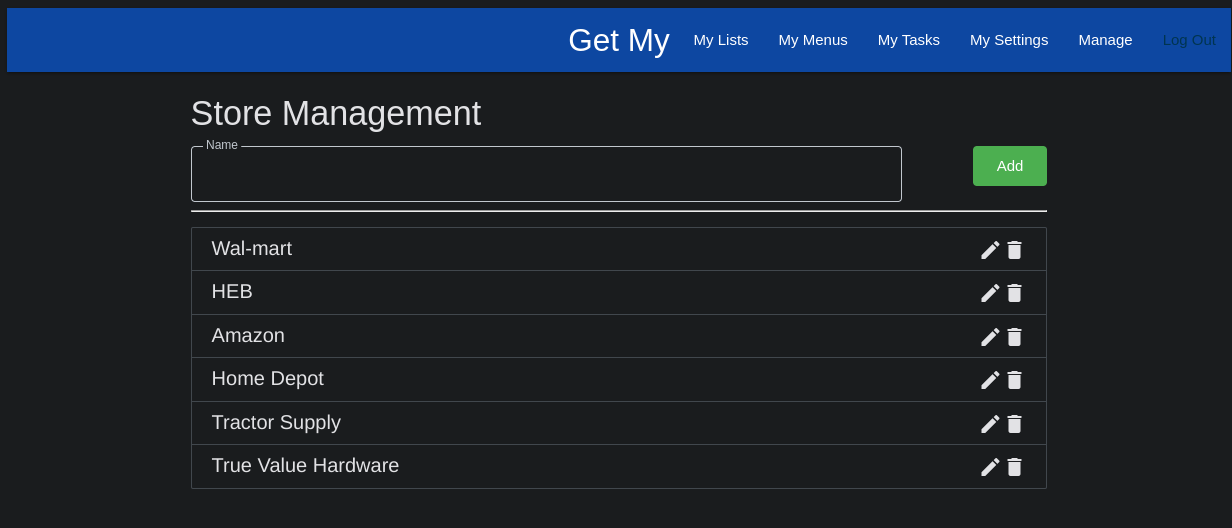
To add stores, a system administrator can navigate to Manage >> Stores, then enter as many store names as you want / need.
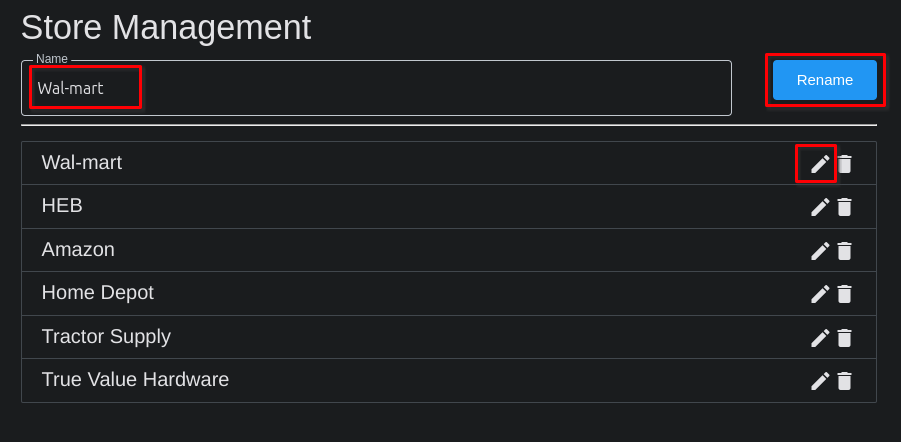
Stores can also be renamed from this page. Simply click / touch the pencil (edit) icon on the row of the store you want to rename (edit the name of), and the Store will be placed into the entry field at the top of the screen. Click 'Rename' when done editing, and the changes to the store name will be saved.
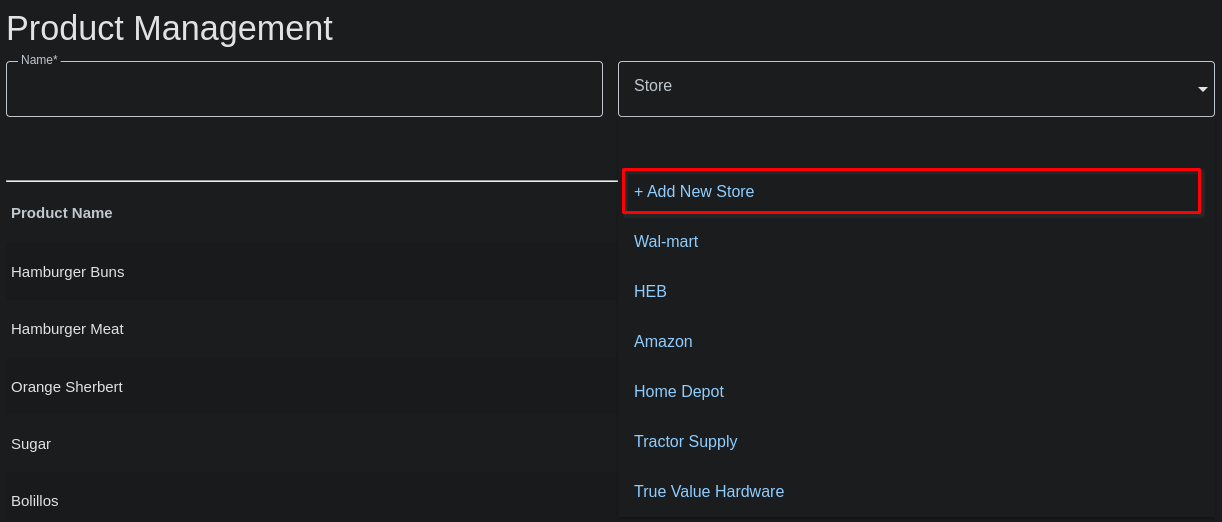
Stores can also be added from the Product entry screen. When entering / editing products, you may find one that you haven't entered a store for yet. Simply click the 'Store' drop-down field, and select the '+ Add New Store' option at the top of the list of stores.
You'll be presented with a small modal (pop-up) window where you can now add a new store name to your list of stores.
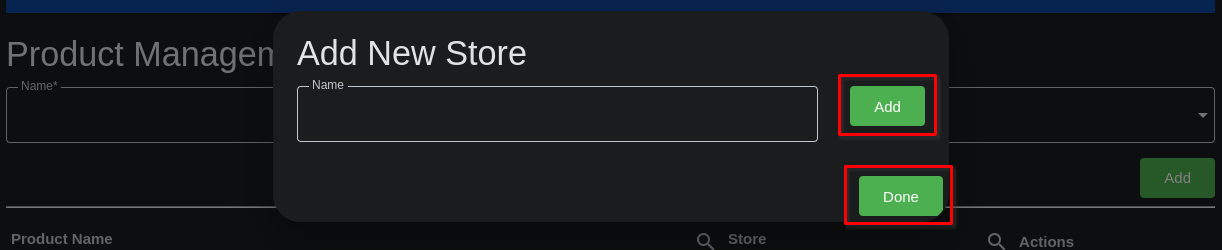
Enter a Store name, then click the 'Add' button to the right of the field. You can add multiple stores this way. When done adding store names, click the 'Done' button to close the modal (pop-up) and continue adding products.
Note: sometimes you'll need to refresh the page before newly added stores will show up when added from the products page.
Add and Edit Products
Products are the items you shop for, or any item you might need / want to put on a list. Get My doesn't have to be used as a shopping list app alone. It can be used for anything you may need a list for. It could be a To Do list (though Tasks are probably better suited for that purpose).
Adding Products can be done by a System Administrator by navigating to 'Manage >> Products',
or by any user on-the-fly directly from within a List.
Note that a List must exist before Products can be added from that location.
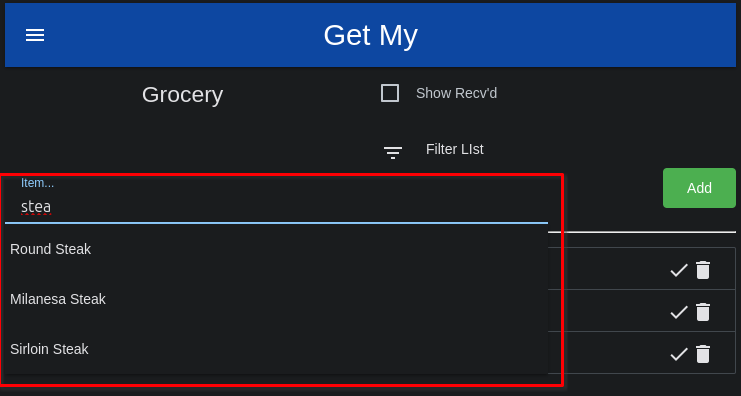
When users add products on-the-fly, they will be presented with autocomplete options that match what they've typed. These autocomplete options are pulled from existing Products already saved in the database.
If a system administrator is keeping up with Product entries, and keeping them cleaned up, as well as ensuring they have associated Stores, the Lists will get faster and easier to create over time using the autocomplete feature. Additionally, the stores will be auto-associated from existing Products.
NOTE: A Product does not have to exist in the Products category before something can be added to a list. Products are most often crated by adding them directly to a List. This simply requires a bit of clean up as you go along.
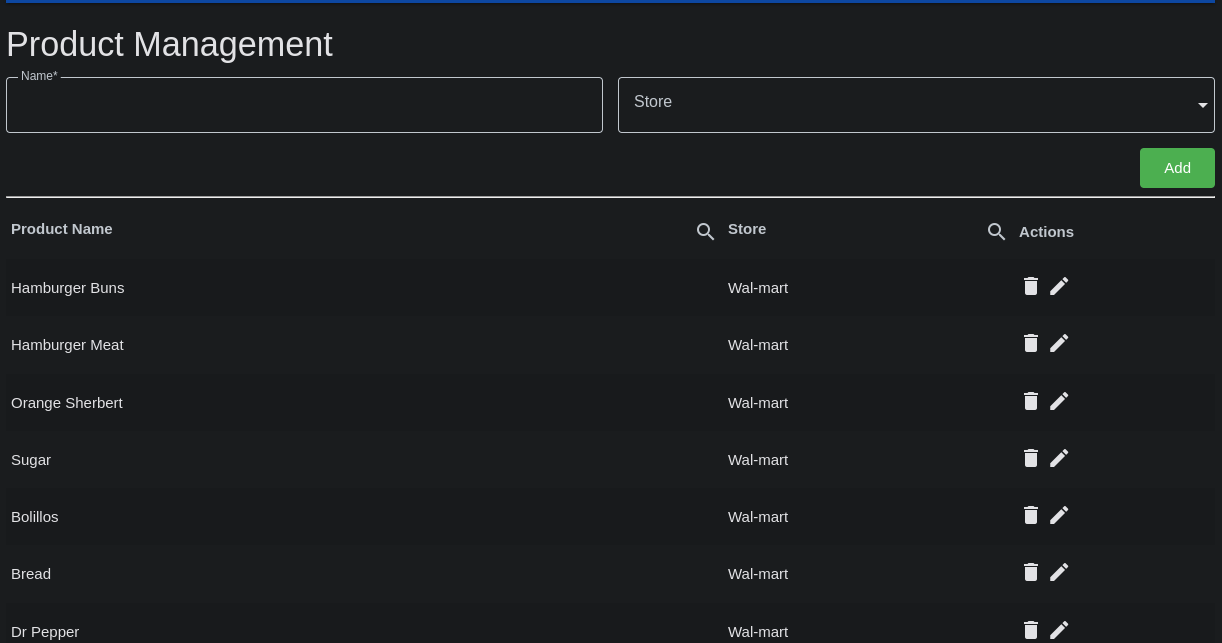
Products can be edited from the Manage >> Products page by clicking on the pencil (edit) icon next to the product you wish to edit. This is also how Stores can be added for Products that were added "on-the-fly".
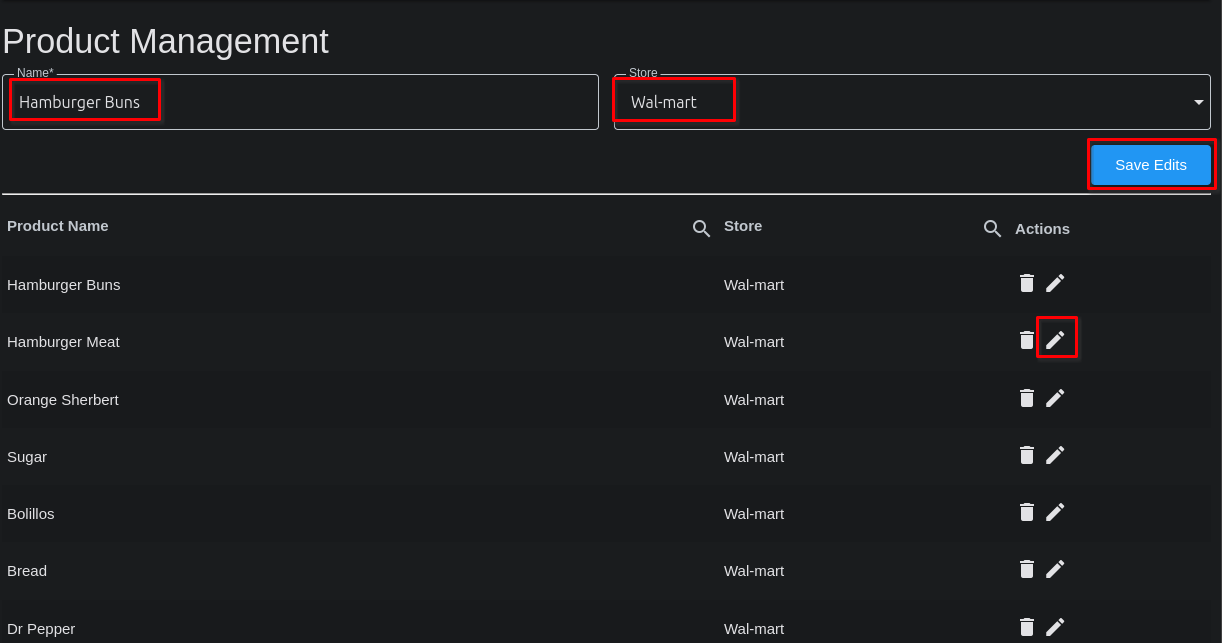
Once the pencil (edit) icon is clicked, the item name and any selected stores will be shown in the form at the top. Simply make any desired changes, then click the 'Save Edits' button.
Products in the table can be searched (filtered) quickly by either the Product Name column, or the Store column. Each column has a small magnifying glass icon at the top in the column header.
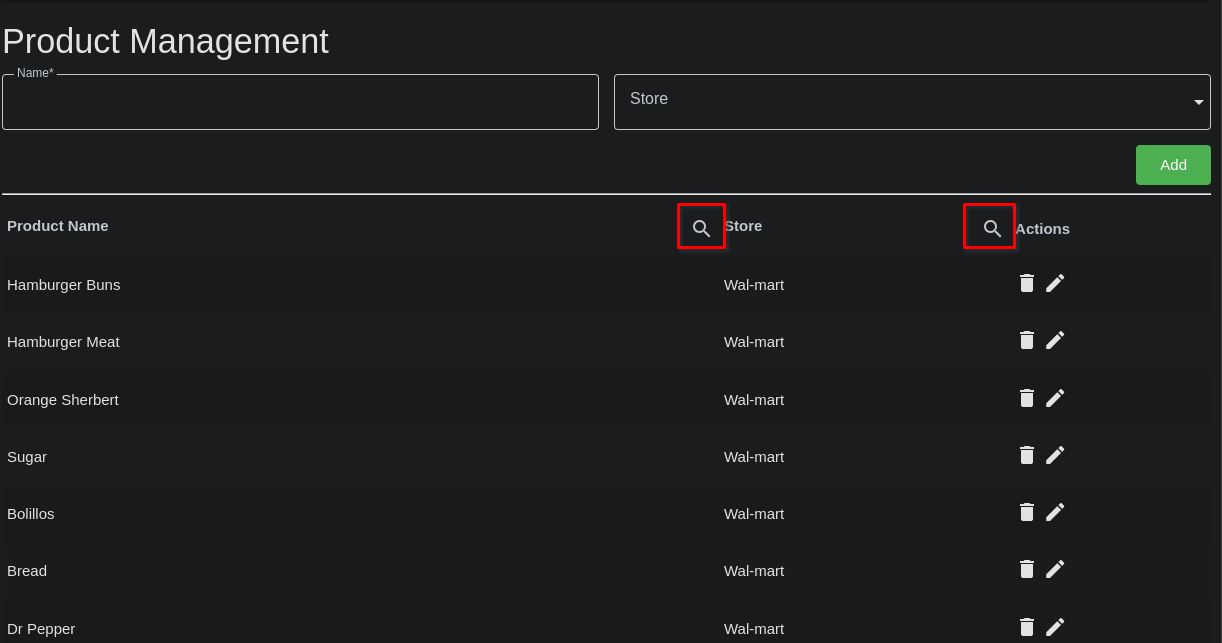
Click the magnifying glass icon, and that header will turn into a search field.
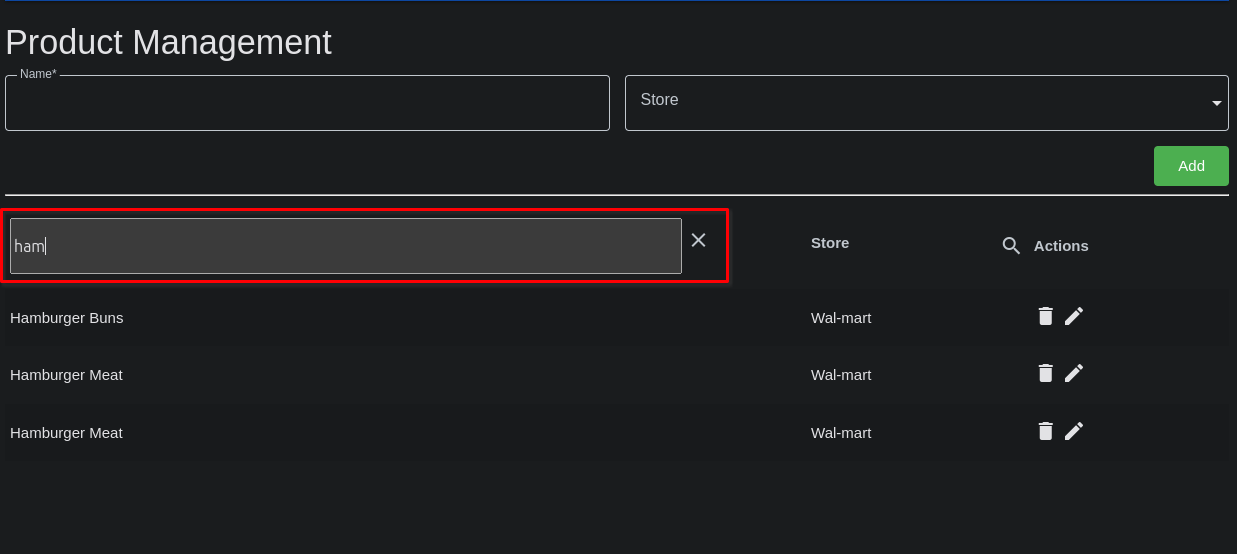
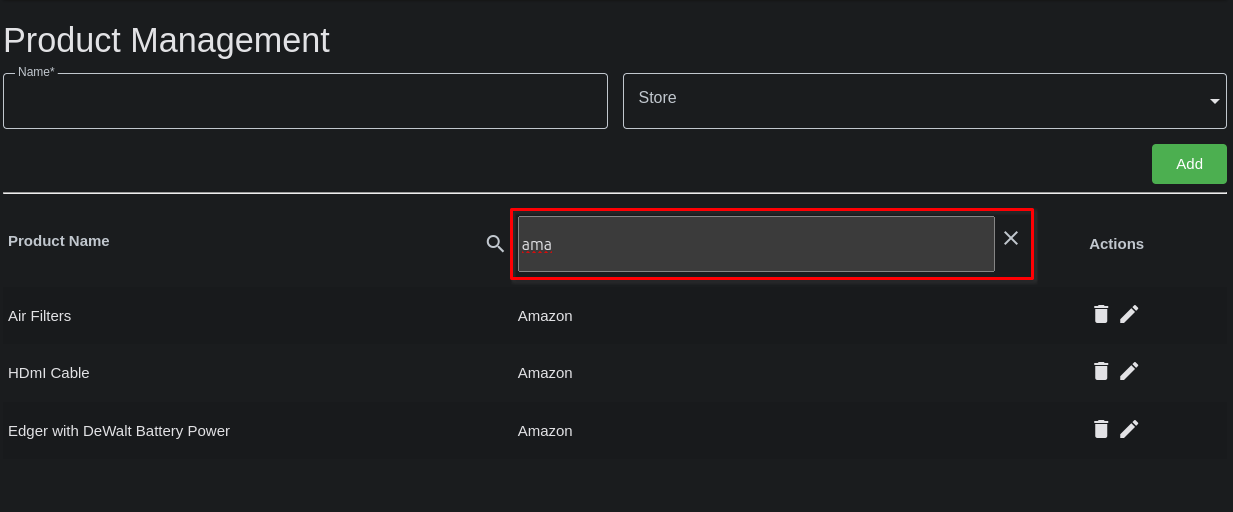
Type into the field, and the list will be quickly filtered to match what's been typed. Click the 'X' to the right of the search field to close the search and return to the normal table results.
Lists
Using Lists in Get My
Creating Lists
Any user can create a new List in Get My. Lists were originally created to be used as a "Shopping LIst", but feel free to use them for anything you want. I've used them for Lists to help me go through all the things we needed to do before leaving on a trip, and so on.
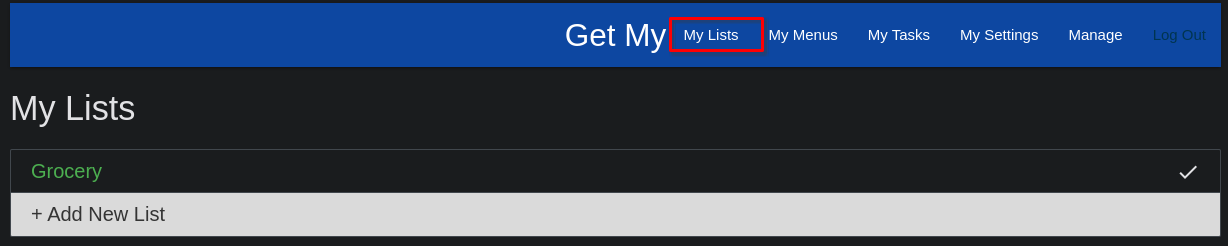
When you go into "My Lists" on the top navigation, or the slide out panel on Mobile, you will see any Lists you've created and not marked as complete, then you'll see an option you can click / touch to create a new List.
Give the List a name that means something to you / your users, and if you want this List to be shared with all of the other users on the Get My install, check there 'Shared' checkbox. Then click the 'Add' button. You can add as many lists as you need / want. When done adding lists, click / touch the 'Done' button to dismiss the pop-up for adding new lists.
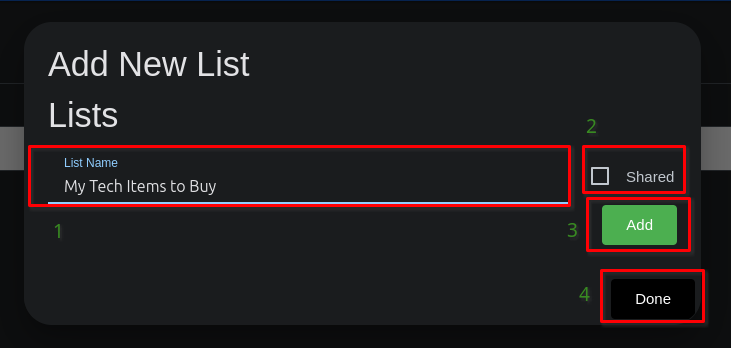
Any list you don't check the 'Shared' checkbox for, will be visible only to your user.
In the Lists listing grid, you can touch / click a row to go into that list. If the List is "complete" (no longer needed / valid) you can touch / click the check-mark icon for that list / row and the List will be removed from the listing grid.
Administration of Lists
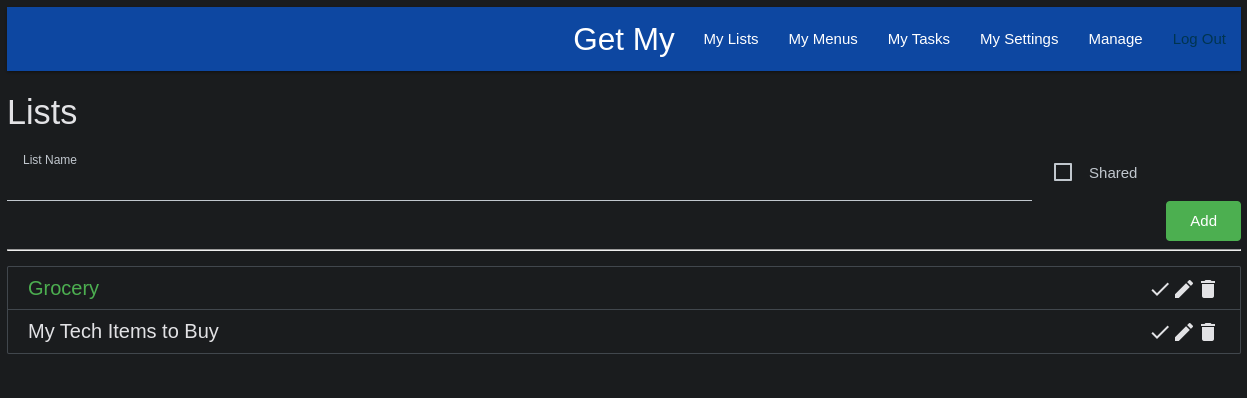
System Administrators can manage Lists by navigating to 'Manage >> Lists' in the top bar or slide out menu.
Once on the List Management page, administrators can add Lists much the same as you would from the My Lists page. Additionally, administrators can Edit, Delete, or mark Complete any Lists currently in the system and not marked complete already.
Adding Items to Lists
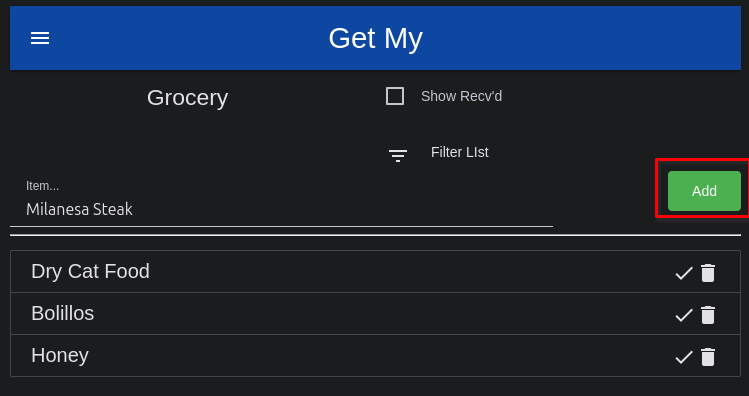
Adding items to lists is as simple as going to the List through the top navigation, or slide out navigation on mobile, and beginning to type in items to add to the list. Just press Enter to add it to the list, or click / touch the 'Add' button to do the same.
A few things to note about List Items. These are kept in a special collection called 'Products'. You can learn more about managing Products here. As a user adds items to a List, the item is also automatically added to the Products collection. Next time a user beings to add an item to a list, the list entry will offer up autocomplete options that match what the user has typed. The user can select the autocomplete option to save on typing, and to ensure they are re-using items that have already been entered.
Since Products can have a Store, or Stores, where the product can be found associated to it the shopping lists will eventually have an option to view items categorized by the store. This is a benefit when you are going to the butcher for instance, and you want to see just the items you know you get at the butcher shop. This keeps you from having to dig through a long, combined, list of items to try and pick out the things you need from the butcher.
As you users add new items, it will benefit the System Administrator to go into the Product Management section and clean up duplicates, spelling, and add associated Stores to items missing those entries.
Beyond just adding items to a List, you can also mark items as ordered (a feature my family uses as we order a lot of our groceires for delivery these days). Tapping on an item will mark it through with a red line, thus indicating it has been ordered (or picked at a store if you and your family do your shopping in parallel at the store even).
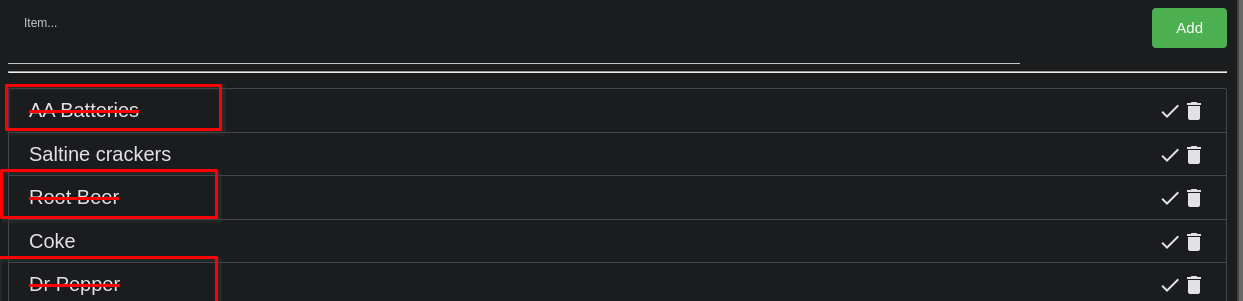
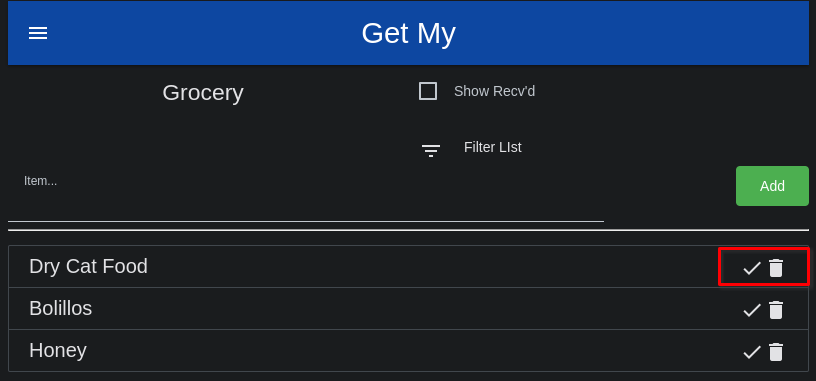
Once an item has been received (after ordering), or has been purchased (after being picked), you can mark that by touching the check-mark on the right end of the row for that item. This will hide the item from the list, and allows you to quickly see if you still have items you didn't receive, or perhaps were unable to find on this shopping trip.
You can use the trash can icon on the right of a row to delete an item from a list completely. Sometimes useful if things are added in duplicate to a list by mistake.
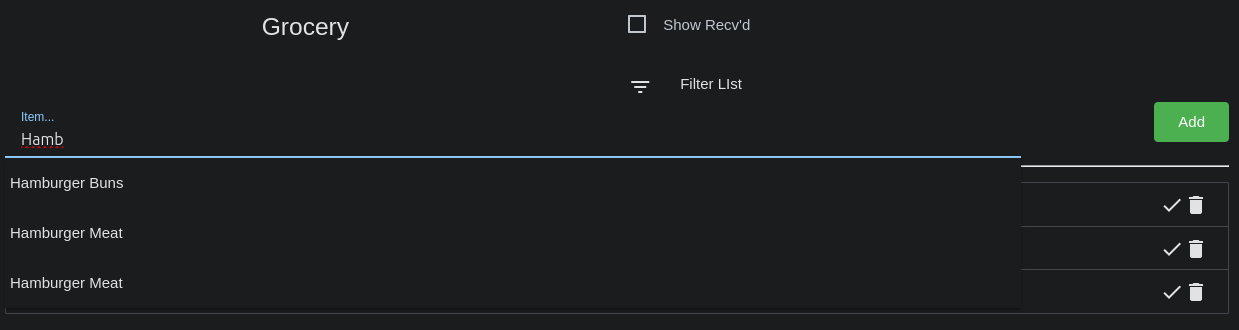
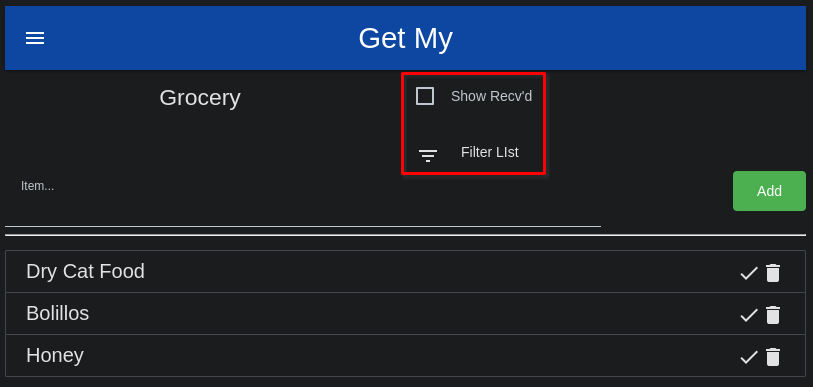
When looking at a list, sometimes it's useful to be able to see items that have been marked 'Received / Purchased' and hidden from view. You can reveal these items by checking the box at the top of the List view labeled 'Show Recv'd'.
Additionally, you can quickly filter the list by clicking / touch the filter icon labeled 'Filter List', then typing in the name of the item(s) you are looking for in the list.
Menus
Working with Menus in Get My
Creating Menus
You can create as many Menus as you want. These work just like Lists in this regard, except all Menus are shared with all users. When you want to create a menu, navigate to My Menus in the top navigation, or the slide out navigation on mobile,
then touch / click the '+ Add New Menu' option on the list of Menus. Enter a Menu name, then click / touch the 'Add' button.
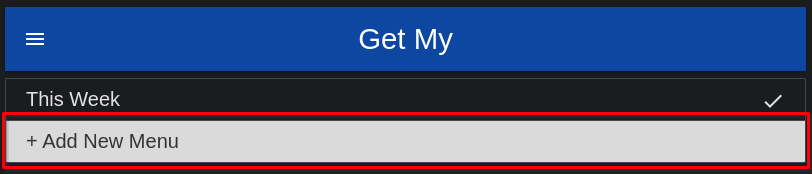
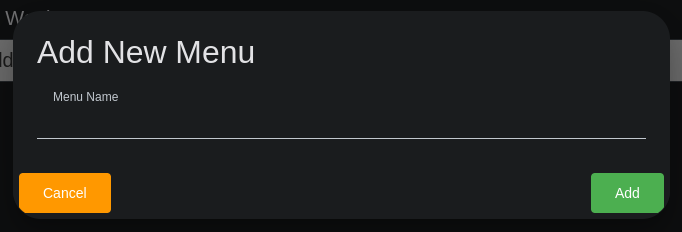
After clicking the '+Add New Menu' option, you'll see a modal (pop-up) window open where you can name your menu. Once named, click the 'Add' button to add the menu and close the modal (pop-up).
You can now touch / click on the new menu you just created to go into it and begin adding menu items and dates to serve those items to your menu.
Adding Items to Menus
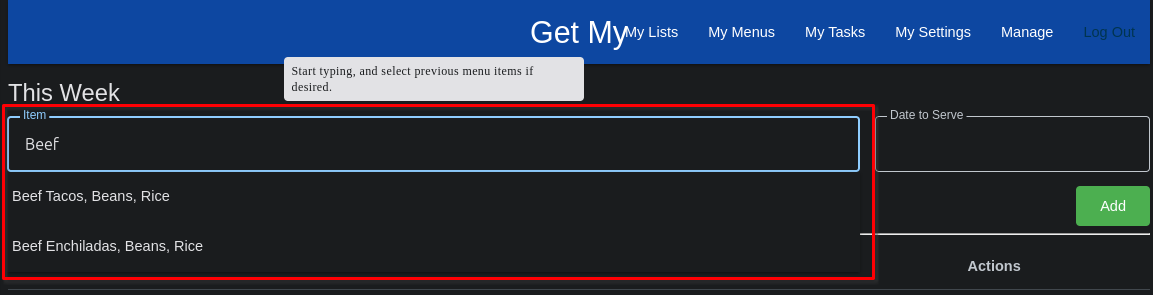
You can type the item into the 'Item' input box. I like to list each dish I'll be serving on a given day, such as "Green Chile Chicken Enchiladas, Beans, and Rice". When typing, just like when adding List Items to a List, the system will offer autocomplete suggestions based on menu items you may have previously entered that match what you are typing. As with Lists, this feature can make generating a menu, and ultimately a shopping list, much easier and more efficient over time.
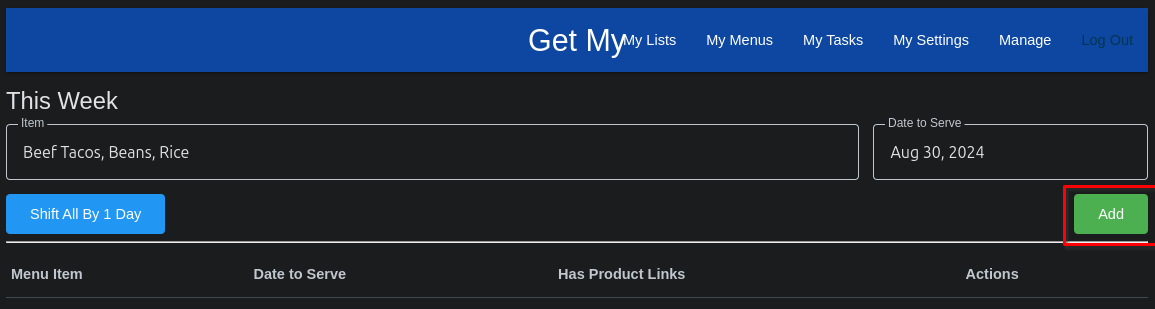
Once you've entered the item you want to serve, click / touch the 'Date to Serve' field, and you'll be presented with a calendar modal (pop-up) from which to choose the date that you'll serve the menu item on.

Select a date by clicking or touching the date, then click / touch 'Ok'. Once the date has been selected, and the menu item entered, you can click / touch the "Add" button to add the item to your menu.
You'll see the items listed below the entry form as you continue to add more menu items to your menu.
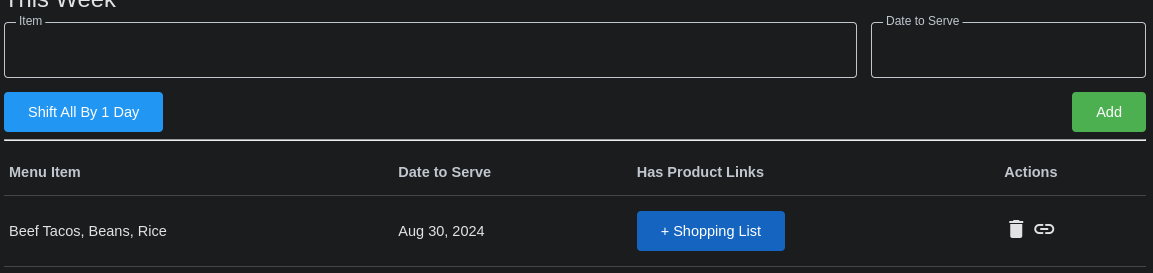
You can delete a menu item by touching / clicking the trash-can icon to the right of the item in it's row.
If you are anything like my family, you may lay out a menu for the next 10 days, but then decide to have left-overs one night instead o what's on the menu. Not to worry, when this happens, just touch / click the 'Shift All By 1 Day' button. This will shift all of the menu items by 1 calendar day later. So, if you planned Beef Tacos, Beans, and Rice for Aug 30, 2024; it would be moved to Aug 31, 2024 instead. And, everything after it will also be moved out by one calendar day.
Link Products to Menu Items
In order to make generating a shopping list easier, and more sane given the menus we create (food is expensive these days), I have added a feature where we can link Products (items that go on a shopping list) to the Menu Items we add for our meals. When you link the products, then add that item to a menu again, you can add those linked products to a List you choose very easily.
First, you'll see a link icon to the right of your menu items. Click / touch the link icon,

and you'll be presented with a modal (pop-up) form where you can select as many products as you need in order to make that menu item.
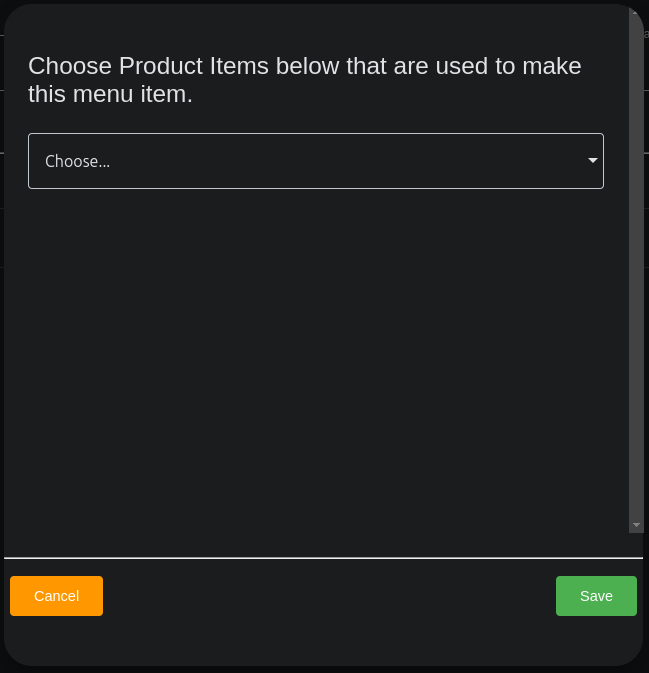
You can search the list by typing to make it easier to find items as well.
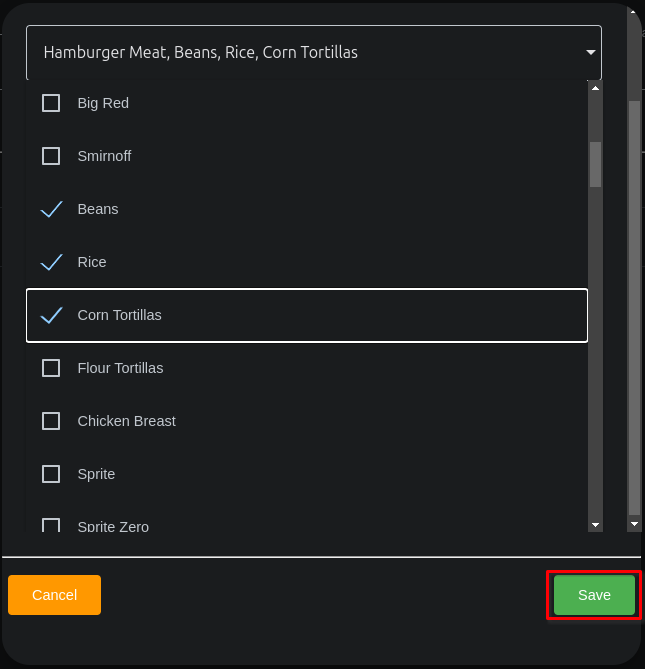
When you've selected all of the products to link to this menu item, click the 'Save' button to create the link. You'll now see a button labeled '+ Shopping List' next to any menu items with linked products.

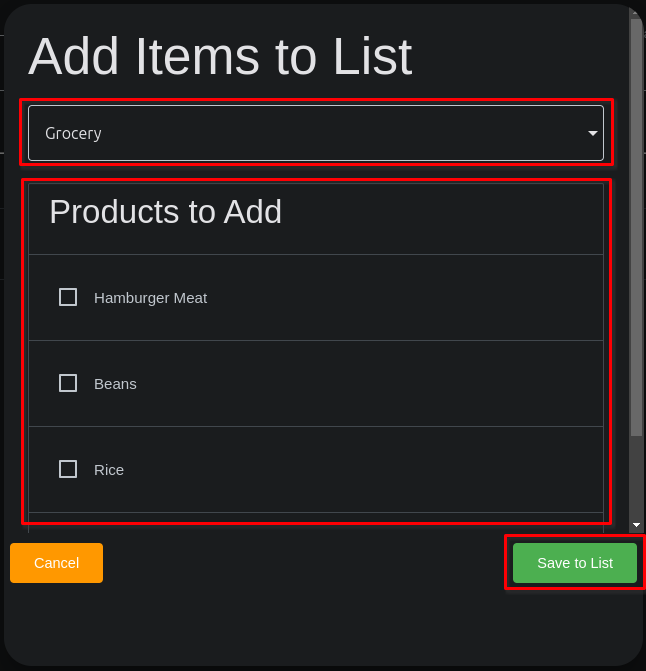
Now, when you add this menu item to any menu, you can click the '+ Shopping List' button, to open a modal (pop-up), then choose the List you want the items to be added to, and select any of the products for this menu item to be added to that list. Sure, you could just go through and add them on the from the List view, but this helps make sure you're only adding things you need for the Menu you've set out. Hopefully it can help you save a bit of money by not buying things you don't need right now, and things that may go bad if not used quickly enough.
Tasks
Adding Tasks (My Tasks vs. Manage >> Tasks)
Tasks is a part of this app I created for my girls really. It was a way to separate and rotate their chores each day / week / etc. They could each login and see what their tasks were for any given day, and know what they were supposed to be doing. It all stemmed from the constant bickering about who did what on which day, and on, and on, as children will do.
Each user can use the My Tasks view to create tasks for themselves. This is a simple module meant to be used actively. There are no push notifications or reminders through email (yet). You just look at the list of tasks each day, and mark them complete as you get them done.
The Tasks will show up with a different color background when they go "overdue" (aren't completed by the due date).
To create a new Task in My Tasks, navigate to My Tasks in the top navigation, or the slide out navigation on mobile.
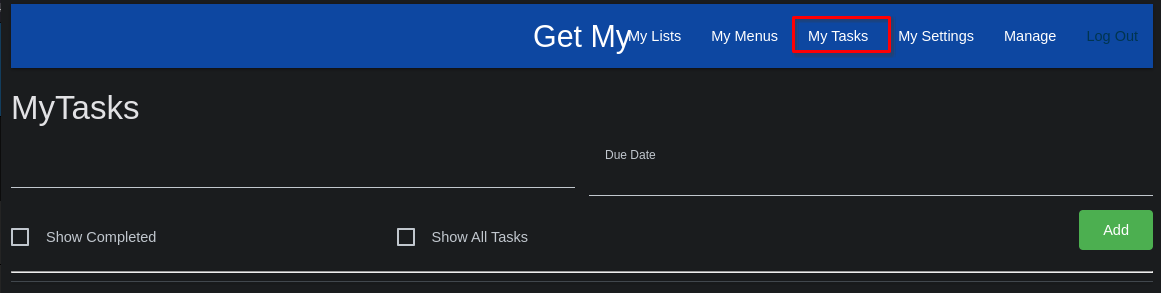
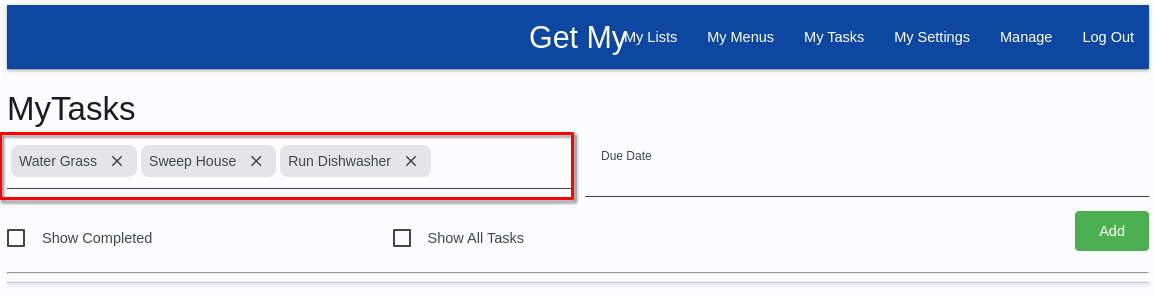
Once there, you can enter multiple task items into the blank under the 'My Tasks' title. After an entry, press Enter, and you'll see the entry turned into a chip. Do this for each item you need to complete on the date(s) to save time on entry (especially for items that will repeat over multiple dates).
Next, you can enter multiple dates using the 'Due Date' field. Click / touch the 'Due Date' field to bring up the date selection calendar.
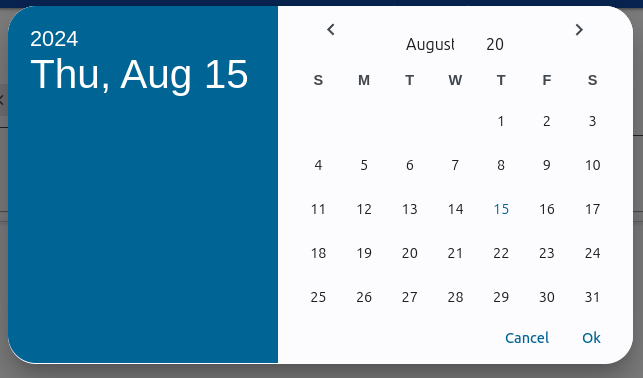
Click the first date you need to complete the tasks on, then click 'Ok'. Do this for each date you need to add a task for, clicking 'Ok' after each date added. You'll see the dates added beneath the 'Due Date' field.
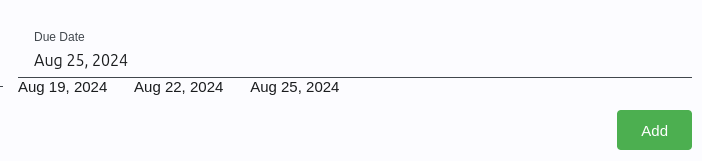
Keep in mind, that for each task you enter, it will be repeated in the task list for each date you enter. In my example I have three tasks to be done on three dates, so there will be a total of (3 x 3) 9 tasks created for the various due dates. Click the 'Add' button once you've entered the tasks and dates you want them done on to have them added to the task list.
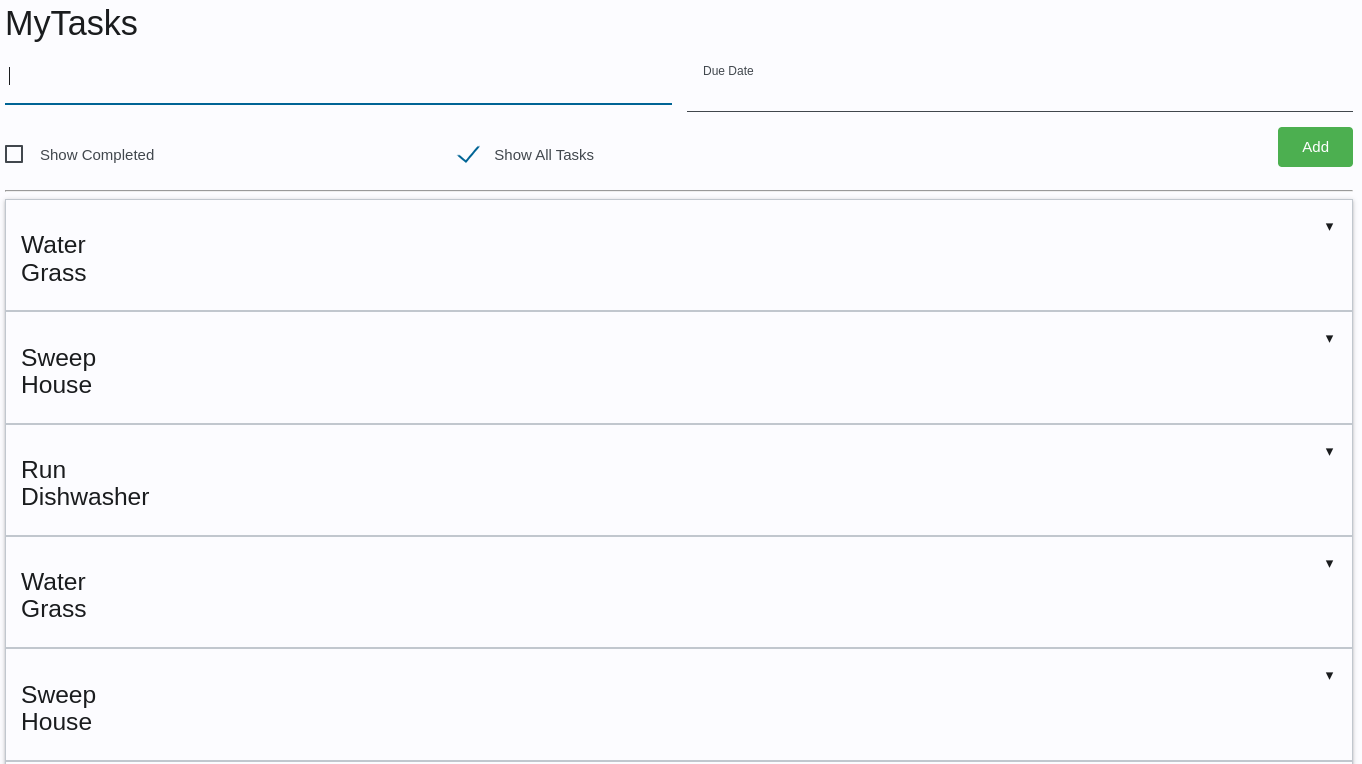
The tasks are expandable sections. Clicking / Touching a section will expand it to give you the ability to see more details about the task, and / or mark it complete.
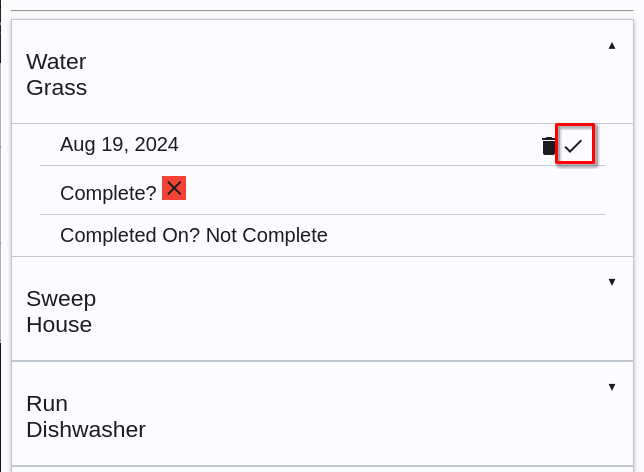
Touching / clicking the check-mark on a tasks details will mark the task as complete, and set the Completed On date for the task. Completed tasks can be viewed by checking the box labeled 'Show Completed'. Completed tasks are displayed with a green background to help differentiate them from the incomplete and overdue tasks.