Lists
Using Lists in Get My
Creating Lists
Any user can create a new List in Get My. Lists were originally created to be used as a "Shopping LIst", but feel free to use them for anything you want. I've used them for Lists to help me go through all the things we needed to do before leaving on a trip, and so on.
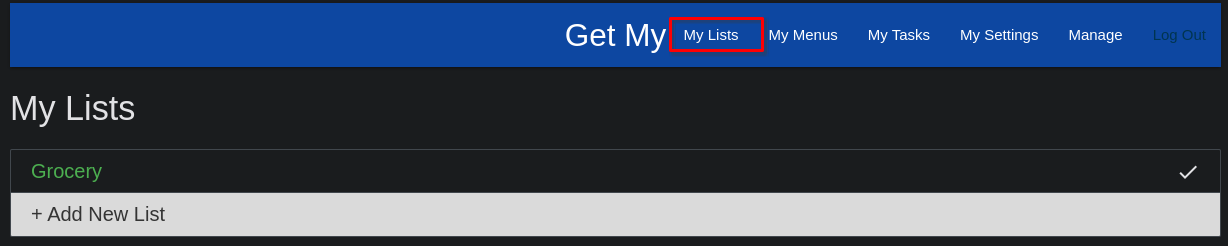
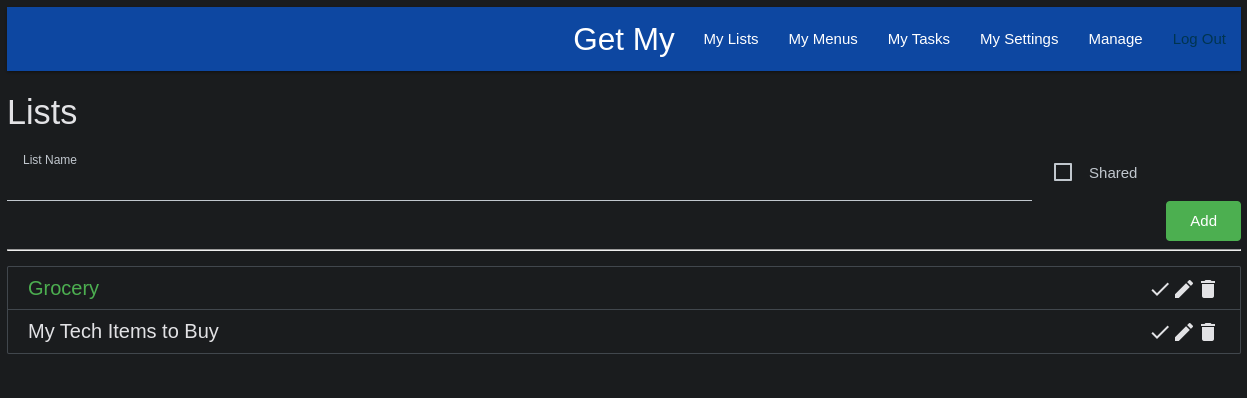
When you go into "My Lists" on the top navigation, or the slide out panel on Mobile, you will see any Lists you've created and not marked as complete, then you'll see an option you can click / touch to create a new List.
Give the List a name that means something to you / your users, and if you want this List to be shared with all of the other users on the Get My install, check there 'Shared' checkbox. Then click the 'Add' button. You can add as many lists as you need / want. When done adding lists, click / touch the 'Done' button to dismiss the pop-up for adding new lists.
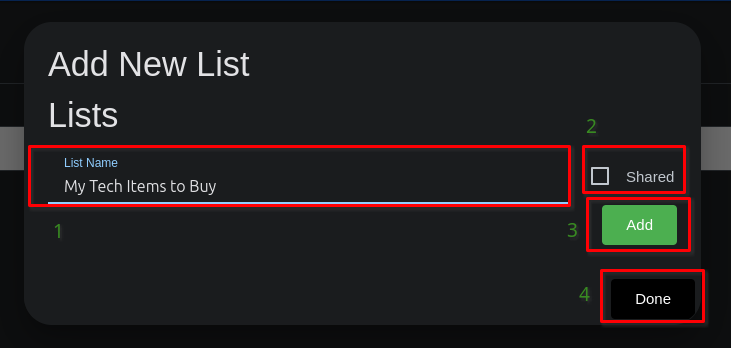
Any list you don't check the 'Shared' checkbox for, will be visible only to your user.
In the Lists listing grid, you can touch / click a row to go into that list. If the List is "complete" (no longer needed / valid) you can touch / click the check-mark icon for that list / row and the List will be removed from the listing grid.
Administration of Lists
System Administrators can manage Lists by navigating to 'Manage >> Lists' in the top bar or slide out menu.
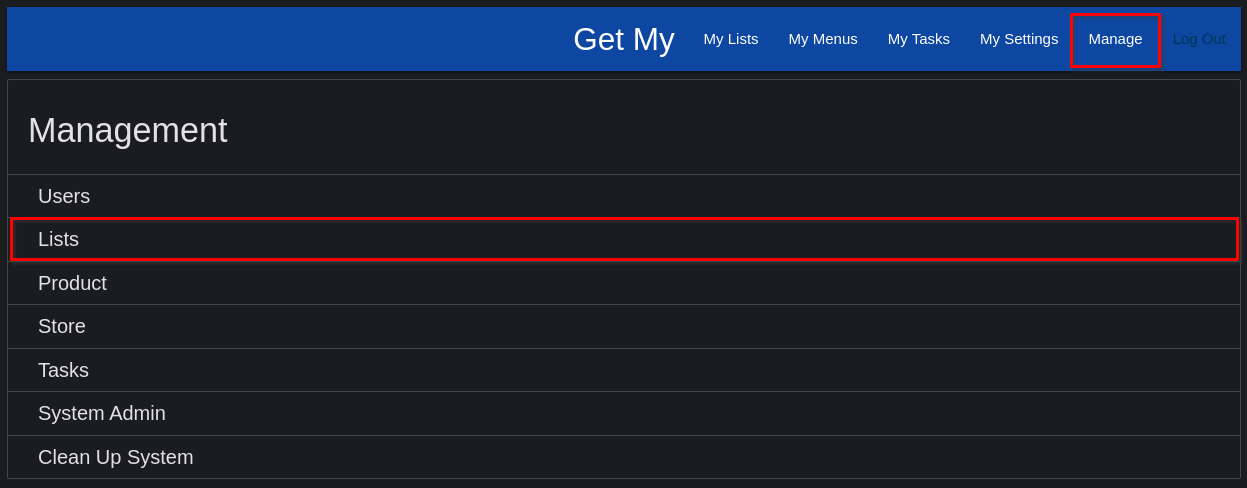
Once on the List Management page, administrators can add Lists much the same as you would from the My Lists page. Additionally, administrators can Edit, Delete, or mark Complete any Lists currently in the system and not marked complete already.
Adding Items to Lists
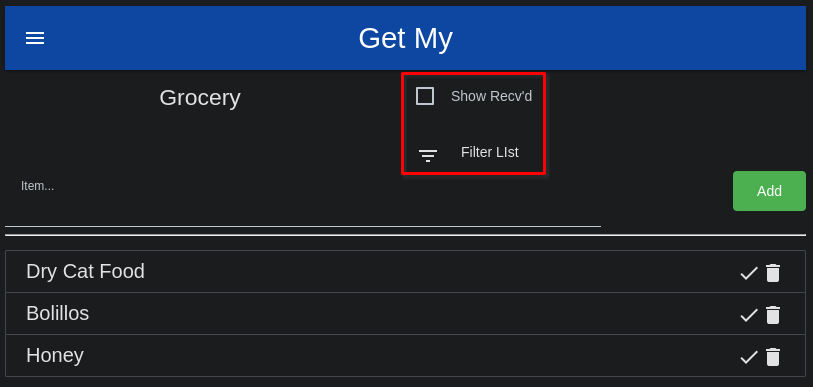
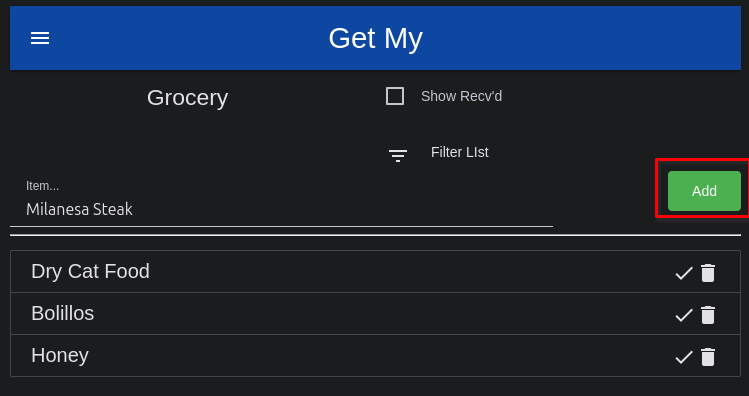
Adding items to lists is as simple as going to the List through the top navigation, or slide out navigation on mobile, and beginning to type in items to add to the list. Just press Enter to add it to the list, or click / touch the 'Add' button to do the same.
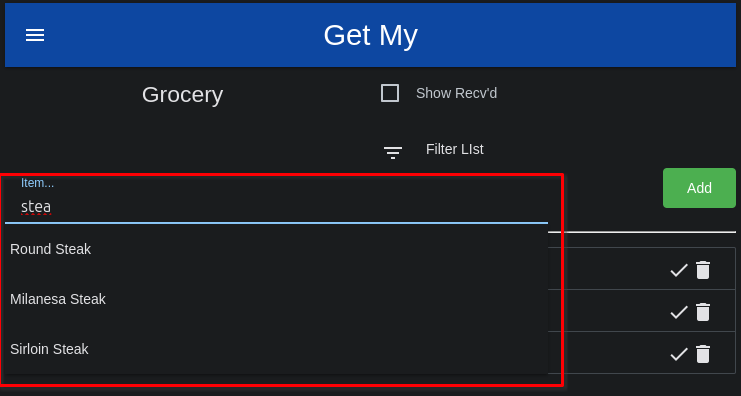
A few things to note about List Items. These are kept in a special collection called 'Products'. You can learn more about managing Products here. As a user adds items to a List, the item is also automatically added to the Products collection. Next time a user beings to add an item to a list, the list entry will offer up autocomplete options that match what the user has typed. The user can select the autocomplete option to save on typing, and to ensure they are re-using items that have already been entered.
Since Products can have a Store, or Stores, where the product can be found associated to it the shopping lists will eventually have an option to view items categorized by the store. This is a benefit when you are going to the butcher for instance, and you want to see just the items you know you get at the butcher shop. This keeps you from having to dig through a long, combined, list of items to try and pick out the things you need from the butcher.
As you users add new items, it will benefit the System Administrator to go into the Product Management section and clean up duplicates, spelling, and add associated Stores to items missing those entries.
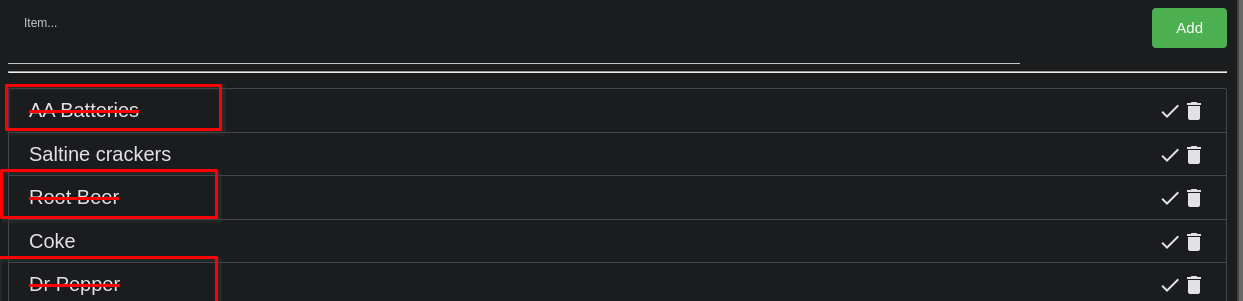
Beyond just adding items to a List, you can also mark items as ordered (a feature my family uses as we order a lot of our groceires for delivery these days). Tapping on an item will mark it through with a red line, thus indicating it has been ordered (or picked at a store if you and your family do your shopping in parallel at the store even).
Once an item has been received (after ordering), or has been purchased (after being picked), you can mark that by touching the check-mark on the right end of the row for that item. This will hide the item from the list, and allows you to quickly see if you still have items you didn't receive, or perhaps were unable to find on this shopping trip.
You can use the trash can icon on the right of a row to delete an item from a list completely. Sometimes useful if things are added in duplicate to a list by mistake.
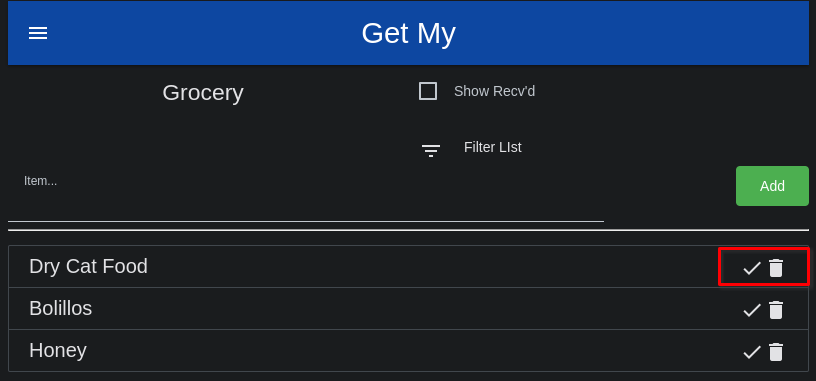
When looking at a list, sometimes it's useful to be able to see items that have been marked 'Received / Purchased' and hidden from view. You can reveal these items by checking the box at the top of the List view labeled 'Show Recv'd'.
Additionally, you can quickly filter the list by clicking / touch the filter icon labeled 'Filter List', then typing in the name of the item(s) you are looking for in the list.